The Joy of Bird Feeding

May 18, 2023

Why feed birds?

It takes time, money, effort, and dedication to consistently feed birds the most nutritious and most attractive foods. Why do we do it?

Enjoyment

The most obvious benefit is simple enjoyment their company can bring us- their colors, their songs, their behaviors. While birds will naturally visit any backyard, adding feeders and bird friendly plants will attract more species and keep them there longer.

Interacting with nature

For many urban birders, the birds they see at their feeders may be the only wild animals they have a chance to interact with. This can be an ideal activity for senior citizens, individuals with limited mobility, or young children to get their first exposure to nature. Children can enjoy the whole process, from buying the food, filling the feeders, and watching the birds.

Giving Back to Nature

While feeding the birds brings backyard birders many benefits, it also benefits the birds by replacing food sources that have destroyed by development. When homes are built and landscaped, birds lose important nesting spots, shelter, and natural food sources, but proper feeding and landscaping can help replace those resources. Our efforts to create inviting habitats in our yards and to provide food and water actually do make a difference.

Your own organic pest control

Birds eat much more than seed, suet, and nectar. Feeding birds in your backyard invites them to feast on the insects such as mosquitoes, snails, and spiders in your landscape.

Combined with Gardening

Truly useful habitat for the birds combines food, water, and places to raise their young. We can provide some food and water, but birds still have to have trees, bushes, perennials, annuals, and “wild places” to thrive.

Bird Feeders

With the right bird feeders, seed and other foods you can better attract birds.

Feeders are not “one size fits all”–different species are attracted to different designs.

A platform feeder or tray is any flat, raised surface onto which bird food is spread. Trays are a great first feeder and attract most species of feeder birds. Backyard birds find food by sight and if you offer foods on a tray with nothing to come between the birds and the food you make it especially easy. Birds prefer its ease of landing and wide space for scratching around for their favorite seed.

Tray feeders are great for viewing birds and their behavior; however, a tray feeder’s capacity is low and the food can get wet, it needs to be filled every day or so.

Even though one feeder can serve many species, a variety of feeders can entice even more birds.

A hopper feeder is a platform upon which walls and a roof are built, forming a “hopper” that protects seed against the weather. This feeder can hold a seed blend that attracts 80% of the local birds and last four or more days before refilling.

A suet feeder provides a very high energy food and is a favorite of woodpeckers. The best suet for bird feeding is a “suet blend cake” made with high-quality rendered beef kidney fat and added protein such as peanuts, nuts, and dried insects.

Tube feeders work well for sunflower hearts or for blends combining sunflower hearts, peanut pieces, and safflower. Tube feeders have smaller food openings and fewer places to perch. This is a good solution for too many doves or house sparrows at your feeder.

Cylinder feeders

Circular cakes called “cylinders hold seed together with a natural protein binder. Cylinders can contain seeds, suet, nuts, or various combinations of those ingredients. Cylinders are great all the time, but they are perfect when you go on vacation because there is always something to eat. Cylinder are exposed to rain so use smaller cakes or cut them in half crosswise and put out half at a time.

Nectar feeders are specially made to dispense nectar through small holes. Choose a feeder that is easy to take apart and clean, because the feeder should be washed or run through the dishwasher frequently.

Characteristics of feeders to consider include:

  • Visibility so birds will notice the new feeder and see the available seed
  • Appropriate feeding ports for seed type and desired bird species
  • Multiple perches or platforms to accommodate many birds comfortably
  • Feeder capacity and refill frequency expectations
  • Pest-resistant features, such as built-in baffles or no-chew construction
  • Suitability to the climate to keep seed dry, if needed
  • Durability and ease of maintenance and cleaning to keep the feeder in top shape
  • Demonstrate how the feeders meet those characteristics.

Types of seeds

Like people, birds have different preferences when it comes to food.

The most common type of seed offered at feeders in North America is black-oil sunflower seed. It is high in energy and has thin shells, making it the preferred food item for a wide variety of birds. Black-oil sunflower is among the favorite feeder foods of cardinals, chickadees, finches, and sparrows. Sunflower seeds mimic the seeds of trees including pine, spruce, fir, elm, and sweetgum, plus flower seeds of all sizes, and of course, sunflowers. Sunflower seeds without hulls are called chips, hearts, or kernels. Sunflower-loving birds split sunflower seeds (cadinals), pound them open (chickadees and titmice), or swallow them whole (doves).

Safflower seed is a whitish seed similar to sunflower in its amount of fat, protein, and calories. It is an excellent problem-solver when used alone in a feeder, because while blackbirds, European starlings, and many squirrels don’t like it, Northern Cardinals, chickadees, House Finches, Tufted Titmice, and many other sunflower-loving birds do. You may have to do a 5ifty-fifty blend of sunflower seeds and safflower seeds to introduce it.

White proso millet, a shiny round seed, is the best small seed to include in blends or offer alone. Such beautiful birds as Dark-eyed Juncos, White Crowned Sparrows, and Painted Buntings are attracted to millet. None of the other grains, such as milo, wheat, and canary seed, are liked as much as white millet, so look for blends that have white millet and none of those other grains.

Birds constantly seek out high-energy foods, and peanuts are one of the highest calorie foods they can find, second only to sunflower hearts.

Peanuts are fed to birds in a variety of forms, including peanuts in the shell, shelled peanuts, peanut pieces, and peanut hearts.

Peanuts in the shell are a challenge and only a few birds have the beak strength to open them. Blue Jays, Tufted Titmice, and many woodpeckers can crack holes in the shells. Jays love peanuts in the shell; they often cache peanuts for later retrieval. Chickadees and titmouse hold the peanuts in their feet and peck it into smaller bits.

If you use a no-mess blend such as sunflower chips, peanut pieces, and hulled white millet, you will avoid piles of shells on the ground or deck. With additions of tree nuts and dried fruit, you can broaden the appeal to even more birds.

Getting the right feeder and filling it with seeds is a great start. But are you providing the best space for the birds? There are many factors that that go into backyard birding and these are some of the common mistakes.

1. Not providing clean water

Birds rely on food AND water from their favorite backyards. Providing a source of water along with your feeder will make your backyard a one-stop shop for birds. Empty and refill your bird bath every few days in both summer and winter.

2. Using Bargain Basement Birdseed

The cheapest birdseed is often loaded with inexpensive fillers such as cracked corn, milo, oats, or wheat. These seeds and grains appeal to very few species, and other birds will toss the seed to the ground instead of eating it, causing a mess of sprouting weeds. Birders can save money on birdseed by choosing the types of seeds their birds prefer and only offering those good foods so none goes to waste.

3. Using Only One Kind of Bird Feeder

Birds have different diet preferences, and different species prefer different feeder styles. Open feeders with trays or perches will attract a decent variety of birds, but to maximize bird feeding it is essential to use different feeders. Consider a mesh sock for goldfinches, nectar feeders for hummingbirds, suet feeders for woodpeckers, mealworm dishes for bluebirds, and jelly feeders for orioles.

4. Not Cleaning Bird Feeders

Dry seed in feeders should be changed every 5-7 days and the feeders should be cleaned monthly. Hummingbird feeder nectar should be changed every two to three days, and cleaned weekly. Don’t overfill feeders until you know how much the birds will eat. Cleaning feeders regularly helps prevent bacteria that can be harmful to birds. If there is any moisture from rain or sprinklers, feeders should be cleaned more often. Clean feeders with hot soapy water or a mixture of 1 part bleach to 9 parts water to get rid of bacteria, fungi, or mold. Rinse thoroughly. Wear gloves.

5. Not Feeding Winter Birds

Many novice birders assume it isn't necessary to feed birds in winter because there are no birds around. In fact, feeders can be even more critical to winter birds than they are during the summer when hatchlings need to be fed, and there are dozens of winter backyard birds, many of which aren't around in the summer, that will happily visit bird feeders for a healthy winter meal.

6. Making Bad Hummingbird Nectar

The best way to attract hummingbirds is to use the right red feeder with clear hummingbird nectar. The red dye found in some homemade nectar or other brands can be harmful to hummingbirds. Never use any sweetener other than plain white sugar to make nectar. Choices such as honey, brown sugar, fruit juices, and artificial sweeteners do not provide the proper sugar concentration for hummingbird food, and they can produce mold that is deadly to the birds. Use a product that contains feeder fresh or nectar defender in your hummingbird nectar recipe. There are other ways to attract hummers. Plant salvias, pentas, cannas, bee balm, porter weed, and other hummingbird friendly plants to make your garden a hummingbird haven.

7. Not providing shelter

Birds find comfort in natural shelter from shrubs, trees, and bushes.This provides cover, protection against predators, and nesting areas. Make sure trees and taller shrubbery aren’t too close to feeders because this can give cats an advantage.

8. Letting Feeders Get Empty

Birds can be forgiving if a feeder is empty for a few days, but a feeder that is consistently empty won't attract birds. Wild birds won't starve if feeders are empty since they get most of their food from natural sources, but they also won't return to an unreliable food source. Refilling feeders more promptly will attract a wider variety of birds in every season and will help keep the feeder clean and in good repair. A seed cylinder is a good choice if your will be out of town a few days.

9. Ignoring Natural Bird Food Sources

Feeding birds does not have to mean putting out multiple bird feeders and spending money on expensive seed, not to mention the time and effort to fill and clean feeders. Birders who avoid natural foods such as fruit trees or nectar-producing flowers, or who kill insects that birds can feed on, are depriving birds of the most nutritious, easiest, and most economical food sources available.

10. Not Protecting Bird Feeders

There are many other forms of wildlife that will raid feeders before birds can even get a chance to have a meal. Raccoons, deer, squirrels, rats, and even bears will snack at feeders, often depleting the seed supply or even breaking the feeders without letting any birds get a bite. At the same time, unprotected feeders also expose birds to predators when their senses are dulled by feeding.

11. Storing Seed Carelessly

Birdseed does have a long shelf life, but only if stored properly. Seed that isn't stored well can spoil and be invaded by pests such as mice, rats, larvae, silverfish, earwigs, or moths. As seed gets old and dries out, it is also less nutritious and will not attract as many birds. If water gets into the seed, mold can grow that can make birds sick and the strong smell may attract even more unwanted pests.
Crotons
September 11, 2025
Fall is just around the corner, but we know it feels an awful lot like summer. These temperatures are likely to persist for the next month, if not longer, and true fall color on the trees in the area might be months further away. The tropical croton (Codaeum variegatum) is the cure for drab Louisiana landscapes needing a jolt of fall color. Though they come in many, many varieties, the classic croton that shows the most color is the popular Petra Croton. All varieties will show many shades of orange, yellow, and reds, including burgundy and almost purple in some types. There are a few tips with understanding how to properly and effectively use crotons in the landscape, or as potted plants for fall décor. First of all, crotons are fairly tropical plants, and have a cold hardiness somewhat similar to tropical hibiscus. Gardeners had become confident of their year-round durability after a period of mild winters in the 90’s and early 2000’s, but most of the past several years have been much too cold for a croton to endure without protection. Those who want to plant crotons outdoors and keep them from year to year should plant in a sheltered, south-facing location, and be prepared to bury them under pine straw and/or cover with frost blankets. Secondly, crotons are not especially fond of wet feet, and moisture will be much more of a problem in heavy, clay soils. Any crotons planted in the ground should be put in raised beds, or at least beds that have been heavily amended with a planting mix. Potting soil is also an acceptable amendment for annual plantings, as it is typically full of perlite, and makes an ideal substrate for not only crotons, but other annuals requiring excellent drainage, such as dianthus, pansies, or cyclamen (which will be coming a little later as temps cool). Crotons should only be watered when they are pretty much dry. It is acceptable to look for early signs of wilt before watering your croton for the first time, as the frequency of watering can vary widely based on environmental factors such as wind, sun, soil type and container size, etc. Another consideration for crotons is the right light. Crotons will show the best color with plenty of sun, but very exposed locations, especially long afternoon exposures, can almost be too much, and will cause leaves to be somewhat washed-out, and leads to more likely scorching from the combination of drought and sun exposure. Keep in mind that crotons like to be dry, but if you wait too long to water and it is in hot afternoon sun, the result will be brownish scalding on the upper leaf surfaces. Deep shade certainly keeps these beauties from burning, but the variegated colorings of the leaves will darken and the plants will be much less vibrant. I think that filtered light, or partial sun exposure, is ideal for these plants. Crotons make excellent container plants, and can even be brought in for winter and grown as houseplants! Container plantings are usually much more insulated from the diseases and headache associated with overwatering and heavy rains, especially if a light mix for indoor and tropical plants is used. Crotons are okay with less than full sun, and will certainly be happy for a few months indoors, especially if given a bright window to grow in our set outside on warm winter days. Crotons are basically grown for their foliage, and should be given balanced fertilizer, or fertilizers containing more nitrogen, such as Osmocote. Fertilizing should be done in early fall, especially if plants are expected to stay outdoors over the winter. Any fertilizing after early October should be achieved with a slow-release organic source, such as Blood Meal. These plants are fairly slow growing, so pruning should be minimal, but never prune any outdoor plants late in the fall. Cutting will stimulate new growth, and new growth will be much more sensitive to drops in temperature than mature stems. If you’re trying to keep a croton’s growth to a certain height, trim at a point somewhat lower on the stem. The plant will typically sprout new growth from where it is cut, so plan accordingly, and trim down below this, so that new growth will not undo the intended size reduction. We have many more than the common varieties. Come over to check out some of these unusual and striking varieties.
Pumpkin Pie
September 11, 2025
We love the look of pumpkins all over the Garden Center! We have large, medium, mini, unique, and of course pie pumpkins! They look cute and mix in perfectly with your festive fall decorations and planters, but they are also the best for pie-baking! Eating pumpkin pie is when you can close your eyes and taste the fall and holiday season. It can bring a nostalgic taste and smell of warm, fun memories of being with family and friends for Halloween, Thanksgiving and even Christmas. We all go crazy for that pumpkin spice flavor in everything! This year, buy your pumpkins then make a pie! This is a great experience for kids to enjoy, too! The first thing you will need is a pie pumpkin. It’s smaller than the large Jack-o-Lantern pumpkins, but not as small as the cute little mini pumpkins. Wash the outside of it, and cut it in half. Scoop out the strings and seeds, and using something like a metal ice-cream scoop, scrape the rest of the innards away from the flesh. This is already getting us in the spirit for Halloween-LOL! Next, rise the seeds in a colander or strainer to wash away the stringy guts. Then cut the pumpkin into manageable chunks. From here you can cook the pumpkin chunks several ways. You can bake them in the oven, or steam them on the stove, or even in the microwave. If using the microwave, use put the chunks into a glass bowl and add about an inch of water in the bottom. Note that it will take about 30 minutes to steam the pumpkin to its desired softness. Once the pumpkin chunks are nice and soft, place them on a cutting surface like a cookie sheet. Let them cool for a few minutes and carefully remove the skin with a knife. Sometimes the skin will peel right off! The next step is to put the chunks into a food processor or blender to basically puree’. Now, it’s time to put all the players together to make your fresh pumpkin pie. Ingredients: · 3 cups fresh pumpkin puree, which you have just made from your pie pumpkin! · 2 pie crust (pre-made or made from scratch with your separate recipe) 1.5 teaspoon ground cinnamon 1 teaspoon ground cloves 1 teaspoon ground allspice 1/2 teaspoon ground ginger 1/2 teaspoon of vanilla extract 1/2 teaspoon salt (optional) 4 eggs 1.5 oz cans of evaporated milk a total of about 18 . 1 Cup sugar OR 1 Cup brown sugar. OR 1/3 Cup Stevia. OR 1.25 Cups Splenda  Instructions Pre-heat oven to 425 degrees. Thaw pre-made pie crusts for 30 minutes if using pre-made. Mix all the ingredients well with an electric mixer. Place the two pie crusts in the pre-heated oven BEFORE you fill them. Then, fill them almost full. Bake at 425 degrees for 15 minutes to "set" the filling. Reduce oven temp to 350 and bake another 45-60 minutes, checking every five minutes until the 45-minutes have passed. Check it by sticking a butter knife into the center of the pie. When it's done, the knife comes out clean. Place on cooling rack and cool at least 15 minutes before slicing. Eat and enjoy….and don’t forget to tell your friends and family you used a real pumpkin to make this delicious pumpkin pie!
September to do list
August 25, 2025
-Re-fresh gardens with seasonal color and perennials for a fall show. -Do not plant pansies until the nighttime temperatures are 65 degrees or lower. -Plant a cool-season vegetable garden. -Start a salad garden in the ground or containers. -Plant bulbs for spring surprises! Planting is easy: dig, drop, done. We now have a fresh shipment of bulbs coming to the nursery in early September! -Divide and transplant Louisiana irises and perennials. By splitting plants now and transplanting, you can move perennials and give them a strong foothold before the cold weather arrives. Make sure to water heavily the night before and keep new transplants moist until rooted in. -The ruby throated hummingbirds can now be seen during their fall migration. Plant a treat for them! We have several choices. Many of their favorites are perennial fall-blooming plants. -Hybrid tea roses may be pruned now to 18 or 30'' tall to encourage a fall flush of blooms. -Continue to water all plants. -Install fresh sod. Water daily for the first week, and every other day for 3 more weeks. Water twice weekly until temperatures start to drop. -Plant Mums when budding – before flowers are open - to enjoy the burst of full color all season. Mums will be here mid-month. -Fertilize plants. Cooler nights and warmer ground temperatures brings abundant root growth. We recommend our Espoma product line of organic fertilizers. These are non-burning, slow release foods that will help plants build up sugars to carry them through the upcoming winter months. -Continue to harvest your garden vegetables. Freeze beans, corn and peppers. Trim and hang herbs to dry for winter use. -Start a compost or keep perfecting it now in time to help enrich the soil for fall plantings. -Mulch all plants in ground or containers to retain moisture and smother weed growth. -Begin planting trees and shrubs. September is a great time to plant and update your existing landscaping. Plants put in ground during the fall get a strong start for spring next year!
Root Stimulator
August 25, 2025
Many people are asking whether the fall is an okay time of the year to plant, with winter being a stone’s throw away. The answer is that it’s the best time of the year to plant! You may think spring is the best time of the year for planting, but it is NOW! By planting in the fall, it takes advantage of the amazing opportunity to get plants established. The first priority after planting is root growth. This occurs best during the fall and winters in Louisiana when shoots and flowers grow slowly. FOCUSED ENERGY Think of the springtime-leaves and limbs growing, flowers erupting, new plants getting established in their new home. It’s a busy time for plants. They have a lot of work to do and they have to do it all at once! It’s like your boss giving you 10 jobs to accomplish all at once. A plant’s energy is pulled into many directions simultaneously. Fall is a different matter. A new tree has only one job to do in the fall-grow new roots. This is exactly what you want a new plant to do for it’s long-term health. A tree will grow roots until the ground freezes in the winter, establishing a strong foundation for it’s future. ENVIRONMENTAL CONDITIONS What season follows spring? Summer. Hot, dry summer. A spring-planted tree will require careful maintenance to insure its immediate health. It is a stressful time for plants, particularly newly-planted ones. Fall planting is less stressful for trees and shrubs. The growth processes are slowing down as the tree goes dormant. This allows the tree to conserve its energy into root production as talked about already. The cooler temperatures and fewer leaves mean that the tree isn’t using as much water which translates into less maintenance for you. Can you successfully plant trees in other seasons? Of course! But the focused energy and the environmental conditions of fall allow for less transplanting shock on newly-planted trees. A tree that is not stressed is a happy, healthy tree. Which translates into less work for you. More time for you to enjoy a cup of coffee on the porch on these crisp mornings. We suggest buying and applying root stimulator when you plant your trees and shrubs. Is this snake oil, or some kind of voodoo? The fine print on the label says it contains something called indole-3-butyric acid. What exactly is this? Well, butyric acid is a synthetic plant hormone that very closely imitates the function of the natural hormone, auxin, in plant development. Auxin is the hormone that tells the tip of a stem or root to grow, and there is an auxin receptor at every node and tip of every stem and root. For example; when our roses become leggy and we cut them back to make them “full” again, we are removing the auxin receptor at the end of that branch, forcing all the side buds along the stem to receive more of the hormone. This is what creates new side branching, which are the next stems to grow and produce new flowers. Just as we deadhead or cut back bushes and shrubs to make them prettier, we tell people to trim or tease the root system of a plant that has just been taken out of a container before planting. This breaks off the tips of those roots that have begun to encircle the base of the pot it was grown in and will allow new side shoots to form at the edges of the root system so the newly forming roots can grow outward and downward, instead of continuing in a spiral. When plants are first in the ground they don’t have the ability to reach any of the water in the soil that is not directly against the existing roots. Many people make the mistake of seeing that some part of their flowerbed is moist and think their plant is okay, but the new plant already drank all of the water right next to its roots and there will be a little halo of dry soil surrounding that new plant. This is where Root Stimulator comes in. Plants really like grow when there are warm days and cool nights and soil temperatures are 55-65 degrees. We can force the plant’s roots to think it’s time to grow, however, by applying the butyric acid. Our root stimulator also contains a wetting agent, which actually helps moisture reach root surfaces, helping those baby roots access every last bit of water available. This will encourage rapid development of new feeder roots and help with easy water absorption while the plant is trying to become established. The fertilizer in root stimulator contains relatively high phosphorus which encourages branching development (think of roots as underground branches), and lower amounts of nitrogen which encourages leaf growth. The larger the root system gets with time, the more water the plant can absorb, even if we are not getting much rain. This is why fully established plants should only ever be irrigated if we are in a serious drought. The surface of our soil may dry very quickly, but the roots of healthy plants are reaching far into the ground to access groundwater not available at the surface. Root stimulator is very easy to use – all you need is a watering can. Simply mix 3-1/2 tablespoons (1.75 oz) of root stimulator into a gallon of water, and water your transplants with it once every two weeks until they get established. Small bedding plants can get about a pint (16 oz) of water, whereas larger plants 2-3 feet tall can get about a half gallon. Larger shrubs and trees will like a full gallon of root stimulator solution once every two weeks. It is important to note that Root Stimulator is not rated for edible plants. By the following spring, your plant should have a well-established root system, and will be ready for conventional fertilizer like tree and shrub food or all-purpose fertilizer.
Bird of Paradise
August 25, 2025
Want to have the fall feel when looking at your landscape? These currently in stock and in bloom shrubs…yes, during our heat wave…bring those yellows, oranges, and other pops of color we all love to welcome the new fall season! Candy Corn Spirea- Its name goes with its look, which all fits perfectly for the fall season! It has the hue of yellow and orange and shines in the sunlight. Planted in the full-sun, it’s a vibrant and low-maintenance shrub known for its striking color changes through the seasons. Butterfly Vine Mascagnia- This full-sun loving evergreen vine bears dark green leaves, and the plant produces clusters of showy yellow, 1 in. wide, orchid-shaped flowers. A second flowering will often occur in the autumn. This heat loving vine can grow on a trellis without support or can be grown as a mounding shrub or ground. This is a great shrub to consider for mailbox color or any arbor/trellis! Little Lime Hydrangea- This compact shrub is a smaller form of 'Limelight' that features large conical flower heads that start chartreuse and change to pink in the cooler, late-season weather, lasting into fall! The flowers are excellent for cutting, and has green deciduous foliage. It is an excellent choice for a partial sun/shade area. Olive Martini Elaeagnus/Silverberry- This is an excellent option for a full-sun area’s privacy hedge or screen, reaching a mature height and width of 10 feet. It is a large and dense evergreen with quite the fall foliage! It boasts bright, yellow-gold foliage splashed with dark green and subtle, creamy white flower clusters in fall that have a wonderful fragrance. Variegated Shell Ginger- Beautiful large variegated leaves and arching stems create a dramatic tropical effect, bringing fall color to a shaded landscape area. Sunshine Ligustrum- This is an outstanding variety producing dense foliage that matures to gold, which looks show-stopping in all the seasons, but really highlights the fall’s famous gold tones! It’s grown for foliage, and its color is best in the full sun. It’s a low-maintenance and wonderful color addition for borders, screens and mass plantings! Canyon Creek Abelia- This compact shrub has glossy dark green leaves that are tinged bronze, with a dazzling bronze-rose fall color! It also has a tidy, mounded habit, only reaching 3’ x 4’, and tubular pinkish-white flowers, which makes this shrub a welcome addition to smaller spaces planted in full sun. Radiance Abelia- This is another outstanding, compact shrub that produces dense foliage that emerge in yellow-green and matures to silvery-green with white trumpet-shaped flowers. When planted in the full sun, it produces consistent color and density year round, with the creamy white flowers in summer and fall. Only reaching 3’ tall, it’s perfect for smaller spaces in the landscape. Orange Bird of Paradise- This is a beautiful and bold structural plant with a tropical look and bright orange flowers rising above the foliage, giving the appearance of a bird’s head. The flowers are excellent for a cut flower garden. Crotons- Considered the ultimate “fall favorite,” the croton checks all the boxes for fall flair in a seasonal yard or landscape display. These partial sun/shade lovers are tropical plant so an idea to consider is temporarily adding them to a landscape, then moving them inside or to a patio for winter protection. They are welcome to stay in a landscape year-round, especially to always have a vision for the fall season! Please note- All Seasons may or may not have these plants in stock available to purchase at the time you come to purchase these. If you're ever looking for something specific, please call the garden center at 337.264.1418 or send an email question via this link prior to your shopping visit!
Ornamental Pepper
August 25, 2025
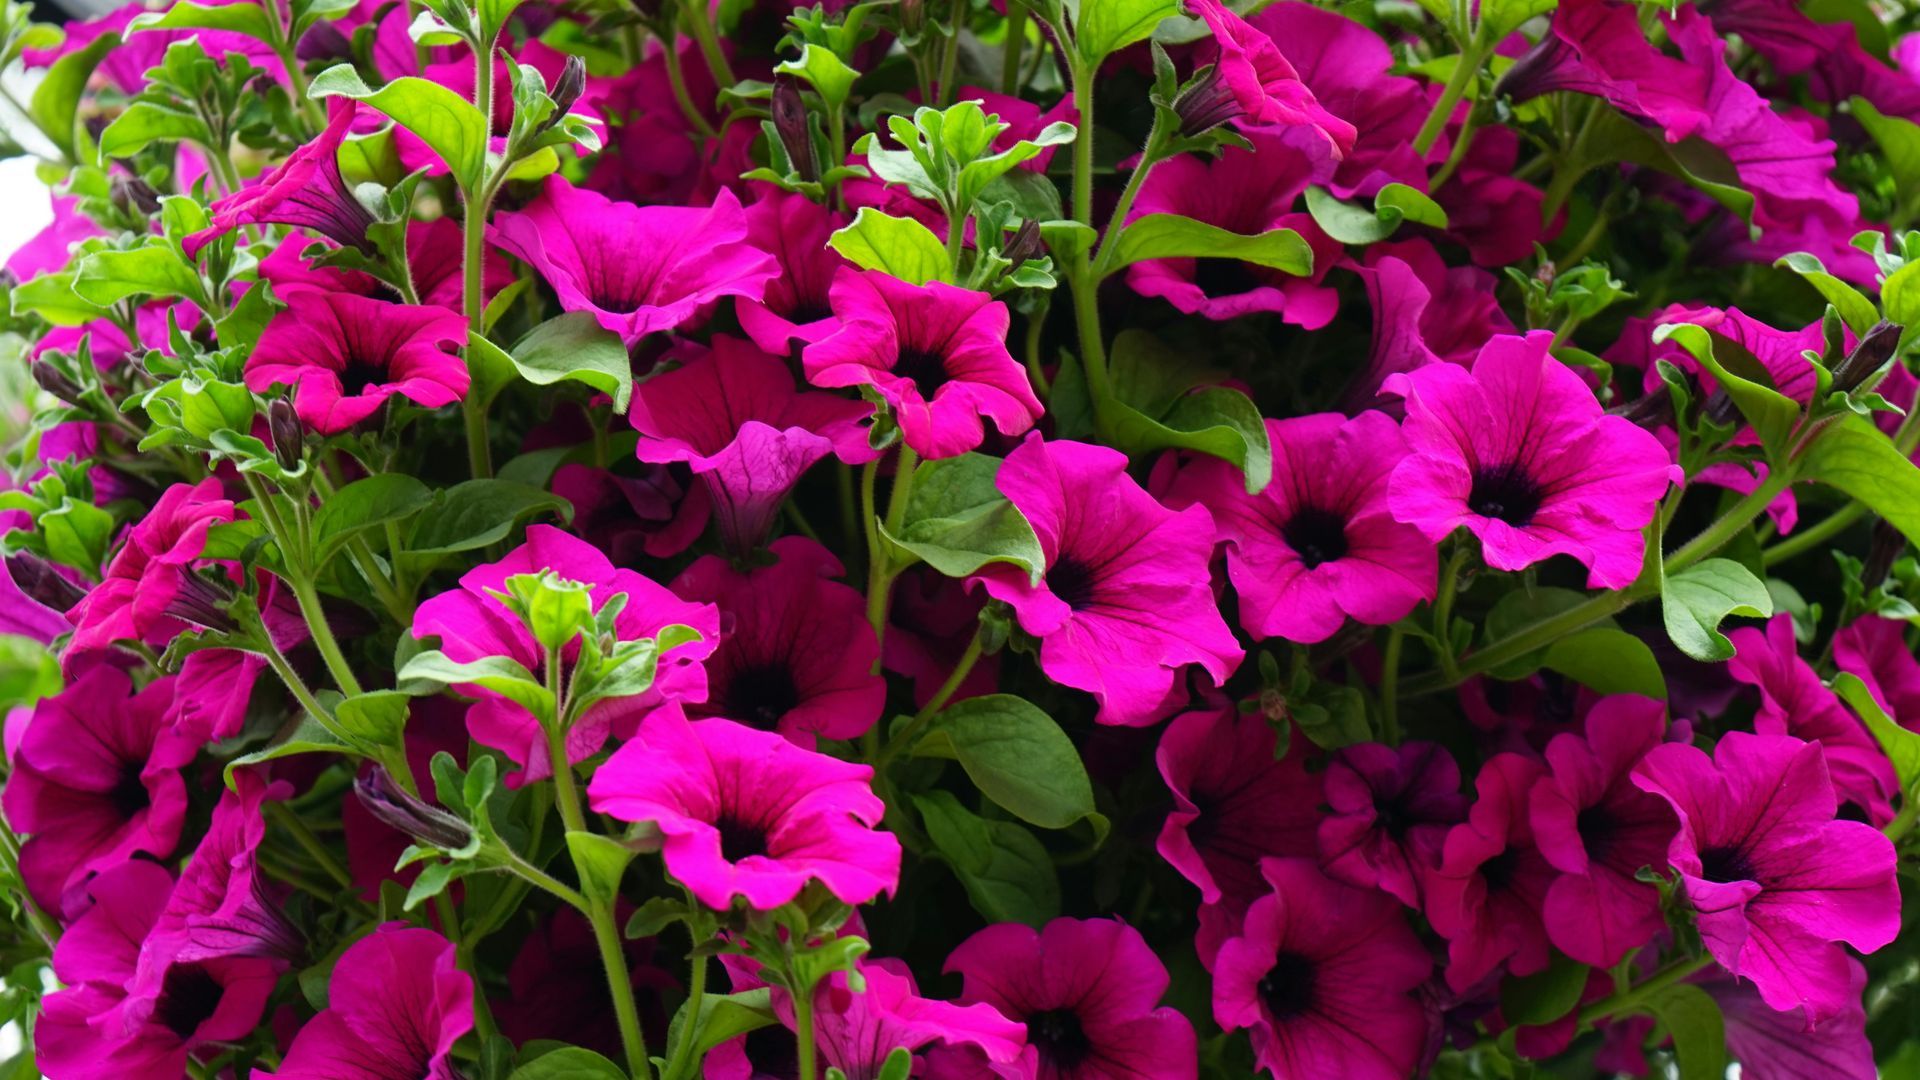
Fall brings a great range of plants to bring in the season, from heat tolerant plants to endure a long, hot fall, to cold-lovers that will survive through to spring! Here are ten seasonal favorites. Croton This tropical foliage plant would really do well throughout the warm season, but it is a fantastic addition to fall gardens for its leaves in shades of red, yellow, and orange. It will endure until first frost, but it may want protection if temperatures dip below zero. Ornamental Peppers Many colors and forms are available, but they all scream South Louisiana like few other ornamental plants. Just like the edible sweet and hot peppers we grow for food, these beauties will not slow down as long as temperatures stay mild. Another heat lover that will carry us into the fall feeling, even if temperatures are summertime-hot! Ornamental Cabbage and Kale The first two choices might not survive a harsh winter, but Ornamental cabbage can thrive in heat and cold alike. They are not even fussy about soil or sun. And, since the colorful foliage is the attractive feature of the plant, one need not worry about how to make it bloom! Plant cabbages fall through spring for a long-lasting show. Edible Greens While we are growing cabbages for ornament, why not share some edible greens in the landscape? They can be planted right now and endure until spring, and many varieties of lettuce or chard offer beautiful leaf colors. Nothing will brighten your mood on a cold January morning like a nice bed of healthy greens to bring to the supper table! Camellia sasanqua While the Camellia japonica, with its large, rosy blooms in spring, is more famous, Sasanquas are a smaller species that are essential for the fall landscape. Blooming will commence in Late September or anytime in October, and carry on through Christmas. Many sizes and forms are available, from tree-sized beauties, to the dwarf, sun-loving Shi Shi Gashira. Try a unique variety and become a Camellia collector. All Seasons carries many unusual and hard-to-find ones. Autumn Sage Fall is a great time to see hummingbirds in the back yard. Why not plant some nectar plants to attract more to your yard. The aptly named Autumn Sage always hits a peak bloom in fall, and is a hummingbird favorite. Plants get about 2-3 feet tall and around, and remain evergreen. Good drainage is essential for these Texas Natives. Snapdragons The jewels of the winter garden, Snapdragons can be planted in fall and will continue to perform through early May. Dwarf and tall varieties are available, but the tall ones always bloom the best. Flowering may slow down if temperatures dip below freezing, but the plants survive and resume in spring with another big show. If flowering slows down, cut them back to encourage reblooming. Petunias Gardeners flock to nurseries every spring for flats upon flats of petunias. We should be planting them in fall instead. They rarely survive summer heat, but make it through winter just fine, so why not get the most bang for our buck? Petunias planted in fall will be better-rooted come spring, anyway, so it actually improves their heat tolerance. Little Henry Sweetspire Most of our native trees go more brown than golden in winter, due to mild temperatures, but a proven provider of fantastic fall color is Virginia Willow, or Sweetspire. Little Henry is a dwarf form that stays at about 3 feet. Leaves turn burgundy-purple in fall but persist on the plant nearly all winter, making a ruby gem of color in otherwise green and brown landscapes.  Viola Tired of your pansies rotting, failing to bloom, fading in the heat? Though related, the tiny viola is everything a pansy is not. Though they are not bulletproof, violas bloom better and for longer, are more heat tolerant, and seem to shake off moisture-related illness better than their larger-flowered cousin. Please note- All Seasons may or may not have these plants in stock available to purchase at the time you come to purchase these. If you're ever looking for something specific, please call the garden center at 337.264.1418 or send an email question via this link prior to your shopping visit!
Fall back to basics
August 25, 2025
From the ground up: Soil preparation for fall planting · When planting in containers, choose a good quality potting soil or container mix. Some may have a slow release fertilizer in them. · When planting in established beds, refresh soil with compost, bed builder, soil conditioner, etc. · When starting new flower beds or vegetable beds, start with bed builder, add compost, peat moss, and slow release fertilizers like manure, bone & blood meal, cottonseed meal, kelp meal or Osmocote. · When planting single trees or shrubs, mix soil taken from the planting hole and mix in compost. Plant tree/shrub on a mound; use soil/compost underneath the root ball and around it. Mulch well. · Always mulch your plants well. It will help with moister retention, soil temperature fluctuations (keeps soil temperatures cooler in summer/warmer in winter) and controls weeds. Caring for plants in the fall · Insect and disease problems are minimal in fall and winter. · A few things to watch for are: Cabbage worms on fall veggies; scale insects on hollies, camellias and citrus trees. · On vegetables use bacillus thuringiensis or spinosad. · Scale insects can be controlled with horticultural oil sprays. Some favorite plants for fall · Early fall color: crotons; mums; ornamental peppers; ornamental cabbage & kale; marigolds; petunias; Swiss chard; red mustard; lobelia; calendulas; gaillardia · Fall & winter color: pansies; violas; snapdragons; petunias; alyssum; calendulus ; leaf plants like ornamental cabbage & kale; colorful lettuces; chard · Perennial color for fall: perennial salvias; hamelia (Fire bush); gaillardia; buddleia; firespike; lantana; rudbeckia · Fall & winter vegetables: cabbage; broccoli; cauliflower; Brussel sprouts; radish; carrot; turnip; spinach; lettuce; beets; chard; arugula; endive; celery · Cool season herbs: parsley; cilantro; dill; fennel; rosemary; thyme; mint; cutting celery · Fruit trees/shrubs: apple; peach; pear; plum; fig; pomegranate; persimmon; mayhaw; blueberry; citrus · Fruiting vines: grapes; muscadines; blackberry; raspberries · Cold hardy trees/shrubs: maples; oaks; birch; holly; azalea; camellia, etc.
Lettuce
August 25, 2025
All types of lettuce (romaine, butterhead, leaf, and head) all grow well in Louisiana. Purchase fresh seeds and the gear needed to plant them here. Seeds should be planted a one-eighth of an inch deep or less. Many varieties of lettuce germinate better if light can reach the seed. Cover lettuce seed with vermiculite or simply press the seed firmly on top of the soil and lightly water them in to achieve a good stand. Outdoor temperatures are generally warm in early fall, so there is no need for a greenhouse to germinate lettuce seed. But if temperatures cool and you move seeds indoors for germination, remember to place the trays in full sunlight or in the sunniest window you have. All emerged seedlings need full sunlight or they will stretch. You know your seedlings are not receiving enough sunlight if the two cotyledon leaves are on top of a very leggy, thin, white stem. The goal for all vegetable transplants, including lettuce, is to be short, stalky and darker green. Leaf lettuce can easily be directly seed into a well-prepared garden soil. But it may be best to start romaine, head and butterhead lettuces in smaller containers and then transplant them into the garden. Space head-type lettuces 12 inches apart. You can double-drill the row with 6 to 8 inches between drills. Plant lettuce transplants or seeds throughout the fall season rather than planting all lettuce on one day. This will help you lengthen the harvest period and not have too much lettuce to eat all at the same time. For example, if you have a row dedicated to lettuce, plant a third of the row in September, a third in October and a third in early November. Leaf lettuce can be harvested by plucking individual foliage off the plant or by trimming the entire bunch back to 2 inches in height. Apply fertilizer on the harvest date and watch the lettuce re-emerge for a second harvest. Head lettuces are harvested once. Because there are so many varieties of lettuce available, it is important to know the average days until harvest. Read the seed packet carefully. It should tell you the average number of days between sowing and harvesting. Many lettuces are harvested between 45 to 80 days after sowing. Harvesting immature lettuce is fine as the taste will be acceptable. However, over mature lettuce becomes very bitter. Lettuce is over mature when it bolts and forms a flower stalk. Often, lettuce is over mature even before the flower stalk emerges. If you pinch off a leaf or two at the base of the plant and a milky substance seeps from the wound, the lettuce is over mature. Although not scientifically proven, Dr. Kathryn Fontenot, an LSU Ag Center Vegetable crop specialist, said she has found that when harvesting whole heads of lettuce, keeping the roots attached to the head and rinsing roots free of soil will lengthen postharvest life. Insects to watch out for include snails, aphids and worms. Only spray insecticides after correctly identifying the culprit. Insecticides should never be applied preventatively. Good luck in the vegetable garden! Dr. Kathryn Fontenot Vegetable Crop Specialist, LSU Ag Center Horticulture Hints
Mum
August 25, 2025
Mums are the gems of fall. The come in a variety of colors and provide instant shape, fullness and fall flair. Combine them with a bale of hay, pumpkins, grasses and all kinds of fall goodies for a true show-stopping display. We have fall decorating bundles for $19.99 and $49.99 that each include mums, hay, and all your fall favorites for easy & festive decorating! Mums fill the gardening gap between the end of the warm-season bedding plants and the true beginning for cool-season varieties. Mums are not year-round bloomers, so they may work best in the back of a flower bed. But, if situated properly, they will provide vibrate fall color for many years to come! They perform well in full-partial sun. When they receive 6-8 hours of direct sun/day it's ideal. Before planting, properly prepare the landscape bed. Select a site protected from the north wind and other windy areas. Plant mums about 2 feet apart from each other. When they are too close, leggy and upright growth are the results. After planting, apply fertilizer and water it in. Mulch. It's important to avoid overhead watering because it will split the mums. Water from the base. You can enjoy mums as normal perennials when following these notes. Remember that they will bloom according to the natural day length conditions, so will pop back up in late spring and fall.  -Keep soil moist through winter. -Prune lightly a few times between late winter and the middle of spring. -Keep mulch fresh. -Maintain insect & disease management. -Apply a slow release fertilizer in spring.
Fall gardening
August 18, 2025
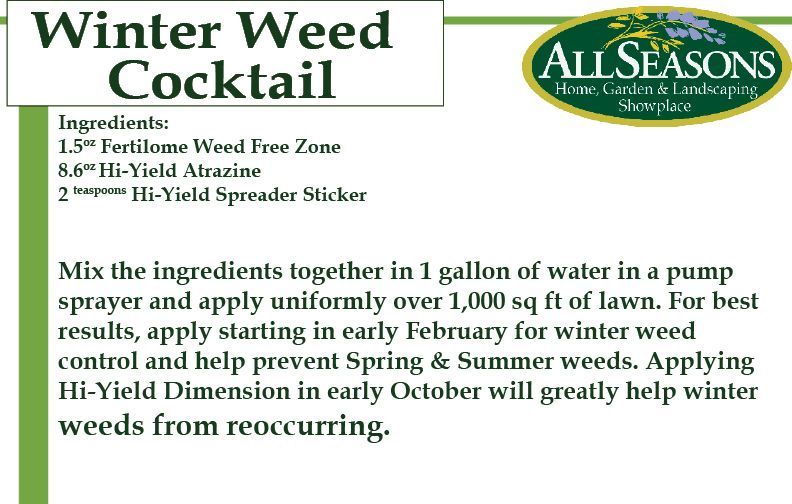
Assess the Damage A flower garden can tell you a lot at the end of the growing season. You'll want to assess the results of all your spring and summer work, and prepare the garden for next spring. First, take a walk around your garden and look at how all the plants did over the summer. Track successes and failures of individual plants. Identify which plants have outgrown their space and need to be divided. Add Mulch Determine which bare areas could use soil amendment and new plants. Add mulch where necessary. Check for Diseases Check the overall health of plants — look for diseases and damage. Replace Old with New Replace summer annuals in containers and garden beds with cool-weather flowers. Prepare You'll want to weed, deadhead faded blooms, divide overgrown plants, dig up non-hardy bulbs for winter storage, remove spent annuals, amend soil and add needed mulch. Replace ties with jute twine. Natural fibers make the best ties because they're more flexible. They'll break down over time, but at that point, it will be time to retie the plants anyway. Amend soil where there are bare spots or where you've removed annuals. Add compost and peat moss to replace nutrients lost during summer growth and to better prepare the soils for spring planting. Turn the amendments into the soil with a garden fork to distribute it evenly. Brush off any mulch that's sitting on branches of shrubs because it can cause leaves and needles to yellow. Preparing the Lawn Fall is a good time to do some minor maintenance in the lawn. Raking up old dead grass (thatching) helps the grass put out new runners for a more lush lawn. Fall is the time for fungus, so a systemic fungicide at this time can help us get ahead of fungus issues. Spreading a pre-emergent herbicide (such as dimension or preen) in the lawn can help us prevent cool season weeds before they start. If you have any established weedy patches, now is also the time to take care of those. Using Weed Free Zone (2-4d) will take care of established weeds in the lawn. Rose Care September is a great time to cut back roses in South Louisiana. Trim back about 25% of the bush and remove canes that are crossing each other to promote better air flow. Fertilize with an organic fertilizer to have another fall show of flowers before winter. Clematis Care Cut the vine back to the ground. New shoots will form from the base next spring. Remove All Annuals from the Garden Remove all annuals from the garden. You can save seeds from most annuals and plant them next year. Zinnias are an easy plant to collect seeds from and to grow from seed. For window boxes, simply remove summer annuals, add more potting mix and plant cool-weather bloomers like ornamental kale and pansies. Disinfect Pruners Disinfect pruners before using them on other plants as you remove spent blooms and foliage throughout the garden. Compost Bin Don't put any diseased plants into your compost pile. Perennial Border Dividing perennials reinvigorates plants and gives you new plants to add to other areas of your garden or to share with neighbors and friends. Ready Your Container Plants Believe it or not, the most overlooked group of plants this time of year is container plants, and there are plenty of things to consider with respect to their care. Annual Container By definition, these plants only last a year, but there are ways to extend their lives. You can, for example, take cuttings of various annuals and root the in either water or a potting medium such as vermiculite, perlite or soil-less potting mix.Just remember to strip all but the top few leaves off the stem, keep the potting medium moist at all times and keep plants out of direct sunlight. Within a few weeks the plants should develop a dense mass of roots, at which point you can pot them up and grow them as houseplants. This doesn't work with all annuals, but it's fun to experiment. Tropical Container Many tropicals, including palms and bananas, make excellent houseplants throughout the winter months. A good move now is to make room for all your tropical plants indoors, because this is also the time of year when sudden drops in temperature can come seemingly out of nowhere. Woody tropicals such as plumeria and citrus can easily be overwintered indoors - or in the garage, as long as the temperature doesn't drop below freezing. Transplanting Perennials Consider transplanting perennials from their containers directly into the garden. Carefully remove them from their pots, trim their roots a bit to stimulate the growth of new feeder roots, stick them in the ground and trim their top growth a little. Herb Container They tend to look pretty shabby toward the end of summer, so either harvest and dry them or consider moving them indoors. Generally, though, herbs don't do very well inside unless they get a lot of natural or fluorescent light. (The same goes for most succulents, though cacti seem to fair best among them.) We have Grow Lights specially formulated for indoor plants! These bulbs fit into any standard light socket! Keep the Birds Coming When you invite birds into your yard by feeding them, they do a fantastic job of keeping the insect population in check, which means you don't have to spray or dust as often to control pests. Don't Forget the Shed! Take time to clean your garden storage area, tossing old chemicals — responsibly of course — and taking note of what you'll need to replenish before next spring.A number of gardening products have a shelf life and may lose their effectiveness over time or if they get too hot or too cold. That's particularly true of botanical insecticides such as Bt and beneficial fungi.And of course you should tend to your tools. Rub metal tool surfaces with a light coating or oil; rub wooden tool handles with boiled linseed oil; and sharpen everything that needs it with a proper file.